


Shopify
Gang Sheet Settings: Print QR/Logo in Shopify
The Print QR/Logo setting allows you to enhance each gang sheet with a custom QR code or logo. This is especially useful for branding or including scannable information such as order links, websites, or product details. This guide walks you through how to enable and customize this setting within your Shopify app.
1. Go to Settings
Begin by clicking on the Settings tab from your Shopify app dashboard.
2. Click on Gang Sheet
In the Settings menu, select the Gang Sheet section to manage sheet-specific customization options.

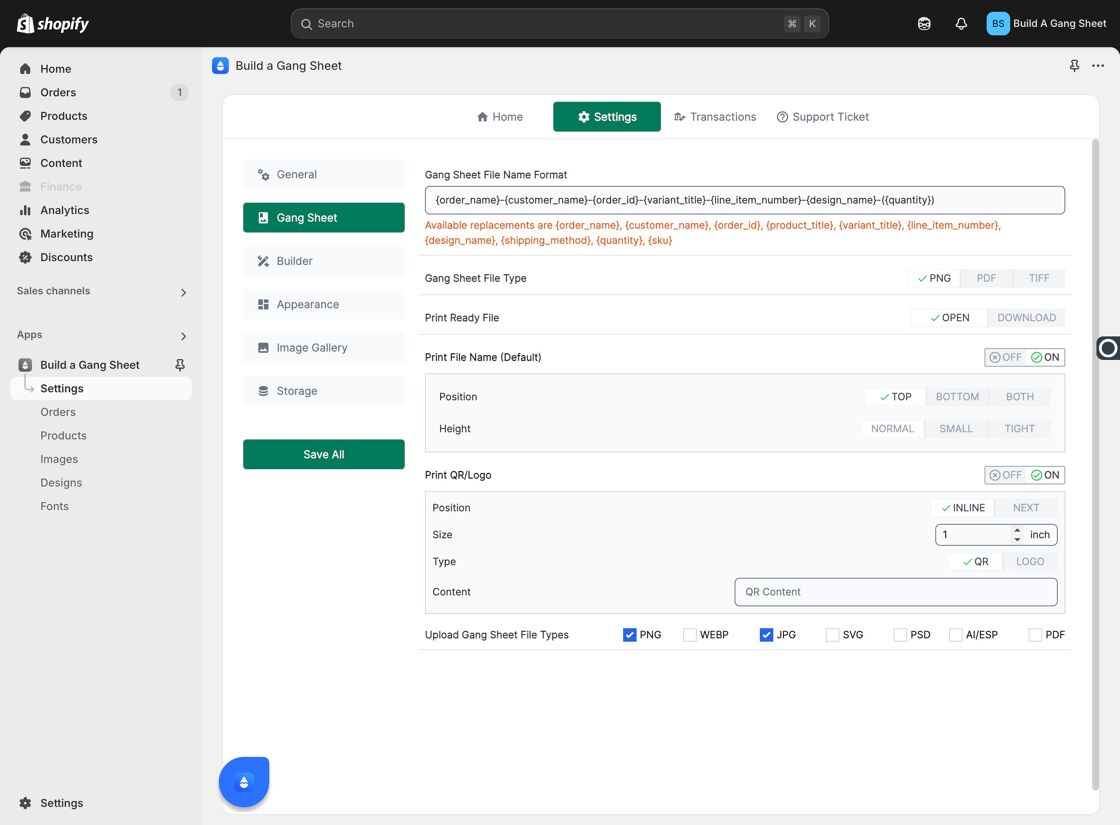
3. Enable QR/Logo Printing
The Print QR/Logo feature lets you include a QR code or your brand’s logo on every gang sheet. This functions similarly to the print file name, adding more detailed visual identifiers to your orders.

4. Choose Positioning
You can choose how the QR code or logo is positioned on the sheet. Options include "inline" (embedded within the design flow) or "next" (placed after the main content).

5. Adjust the Size
You can customize the size of the QR code or logo to best fit your gang sheet layout and design specifications.

6. Select and Upload Your QR Code or Logo
Choose whether to print a QR Code or a Logo on the gang sheet. Then upload the corresponding image file or input the required data to generate the QR code.
Why Use This Feature?
- Adds a professional and branded touch to each printed gang sheet.
- Helps identify orders quickly through QR-scannable codes.
- Improves customer experience with easy access to information or links.
Tags
QR code, logo print, gang sheet, Shopify customization, branding, print settings