


Shopify
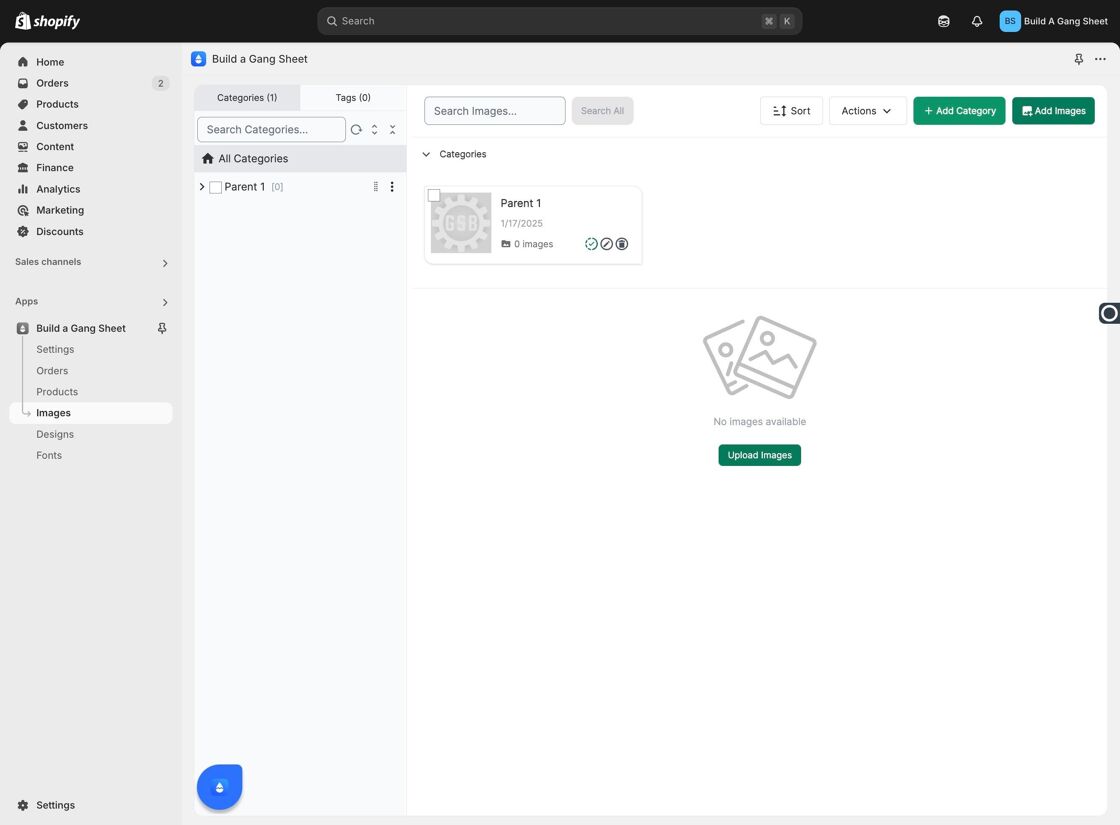
Images: Categories
Categories help you organize images within your Shopify gallery, making it easier to manage collections, themes, or customer-specific designs. This guide walks you through how to create categories, assign cover images, and enable optional features like color overlays.
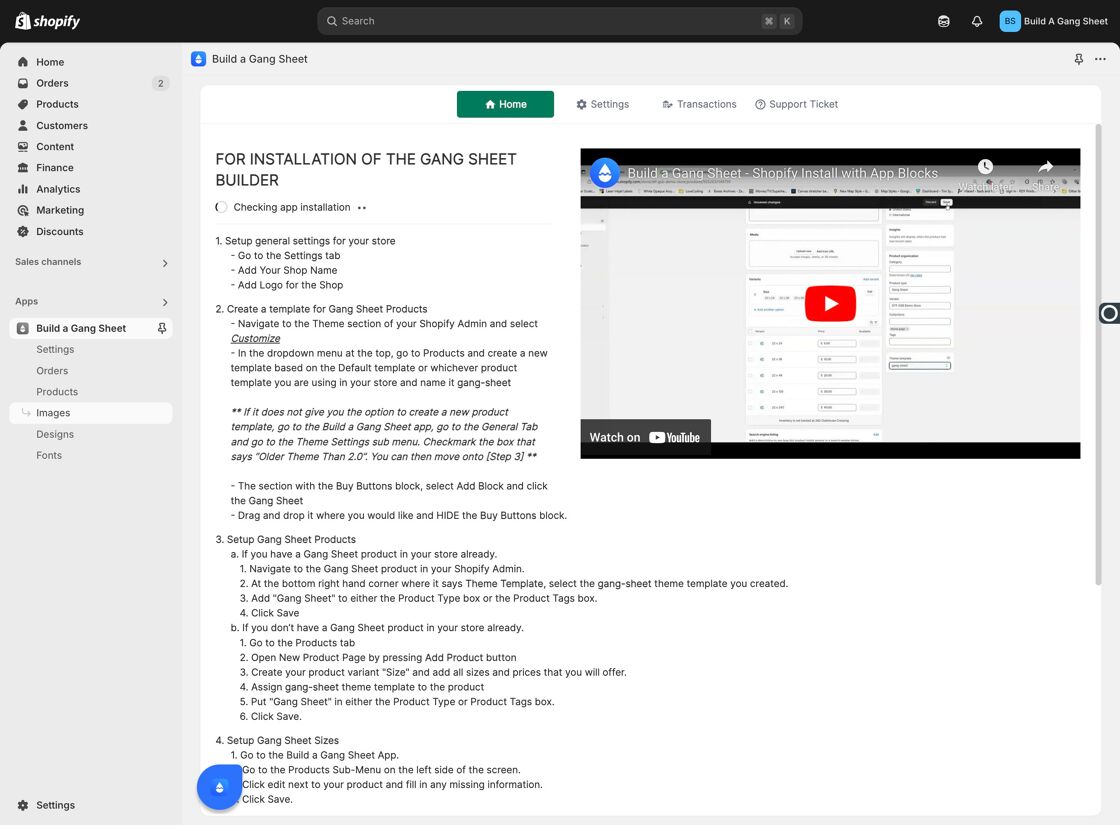
1. Open the Images Tab
Start by clicking the Images tab in your BAGS app to begin setting up your image gallery.
2. Click "Add Category"
To begin organizing your images, click the Add Category button. You must create a category before uploading any images.
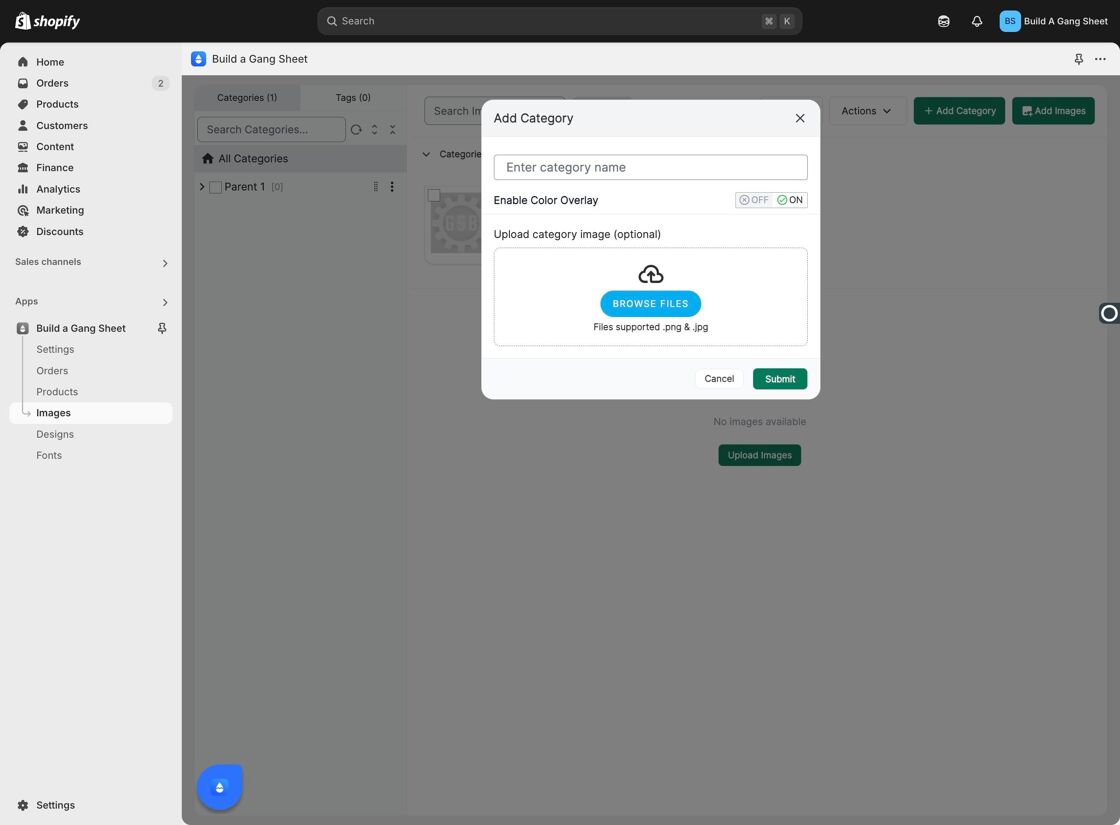
3. Enter a Category Name
In the field labeled Enter category name, type the name for your category. This name will serve as the folder title within your image gallery.

4. Label the Folder
You can re-click or confirm the Enter category name field to finalize the title and begin configuration of that folder.

5. Enable Color Overlay (Optional)
If desired, toggle the Enable Color Overlay option. This feature allows customers to use blend and overlay modes when customizing images from this category.
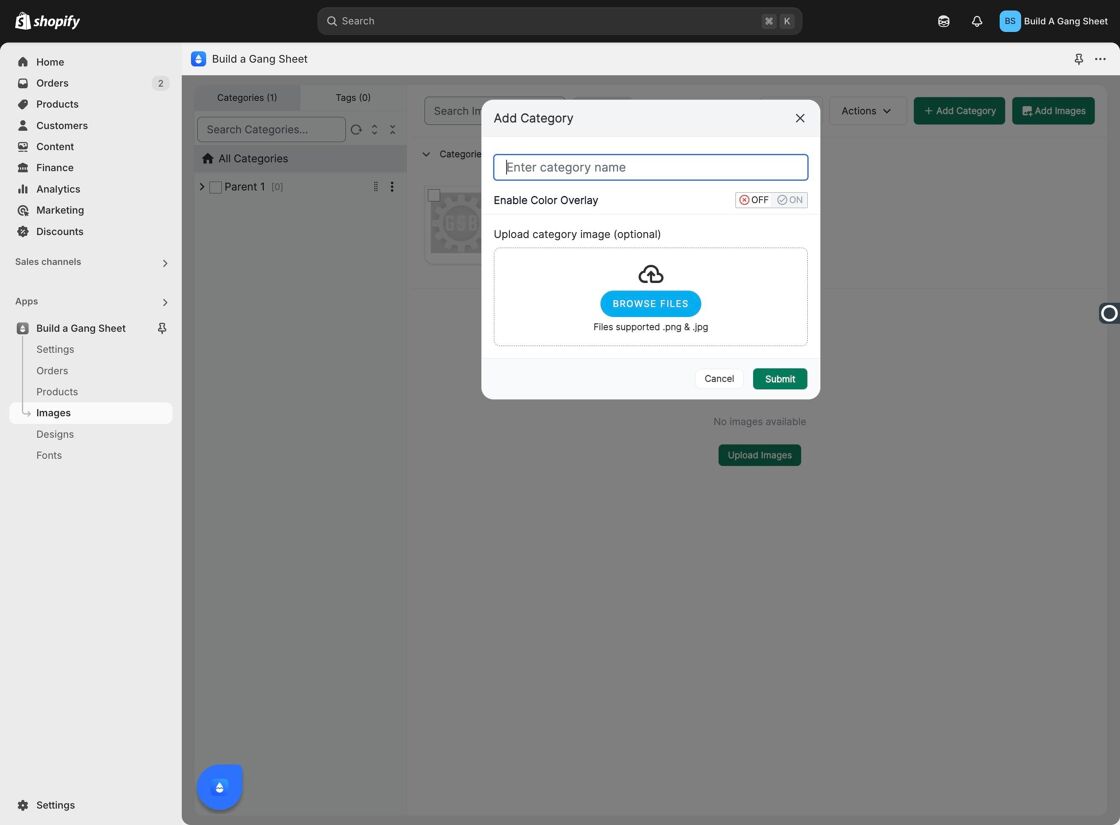
6. Upload a Cover Image
Click Browse Files to upload a cover image for your category. This image will represent the folder visually in the gallery interface.

7. Submit the Category
After entering your category name and uploading a cover image, click Submit to save the new category to your image library.
Why Use Categories?
- Organizes your gallery into easy-to-navigate sections.
- Improves admin workflow by grouping images by use case or theme.
- Supports advanced features like overlays and subcategories.
Tags
images tab, image categories, cover image, color overlay, Shopify gallery